A place to share my latest creative pieces. (I know a million bloggers already do this, but I NEEDED a place too!)
Showing posts with label Creating with Fabric. Show all posts

5.18.2012

Placemat Pillow

This was an idea I saw a few years ago, and now I can’t even remember where I saw it, but I’ve always wanted to try it—a decorative pillow made from a fabric place mat!

pillow 4

First, find a cute fabric placemat that has two layers.  We actually got 4 of these as wedding presents, but I haven’t pulled them out since we had kids, and I figured there’s no reason they should just sit in a drawer. 

pillow 1

The next thing, is to get a seam ripper and take the seam apart that holds the two layers together.  It doesn’t have to be a huge hole.

pillow 2

Next, get some fiber filling and stuff it as full as you can!

pillow 3

Then, depending on the seam, you just hand sew it back together, or because of this seam, I just used my machine!  Simple as that.  A new pillow for my bed in 20 minutes!

pillow 4

Happy Creating!

4.26.2012

Spring Pillows

I got my spring pillow slip covers done—like two weeks ago, just slow at blogging.  Here’s a peek at what I did.  And I actually got a little bit more fancy this time because I will be keeping these covers on through June. 

pillows 1

That white flower strip is actually ribbon!  So stinkin’ cute!

pillows 2

Here’s a close-up of the ruffles.  Just ribbon so it was quick and easy!  I ♥ ruffles!

pillows 3

I got the yellow chevron fabric from Bobbie Lou’s Fabric Factory (on Etsy).  The green damask is from Walmart.  The blue polka dot was from fabric.com.  All the ribbon is from Hobby Lobby.


Happy Creating!

3.12.2012

March Pillow Slipcovers

Just a quick look at the pillow slipcovers I made for March/St. Patrick’s Day.  The fabric is from JoAnn’s.  Another simple and easy set.

pillow slipcovers i

After I made them, I read somewhere that when you make slipcovers for your pillows, you should use the same measurement of fabric and not adjust for sizing so that they are “filled”.  I will try that next time as the two bigger pillows seem to be drowning a little bit in their covers! 

Happy Creating!

3.09.2012

Simple T-Shirts--Without a Machine!

The other day my oldest dropped a plain red t-shirt on my office table.  "Mom, I want you to do something with this shirt."  I chuckled inside.  I love it that my kids think that I am oh so crafty to do something with a plain t-shirt.

After some inquiring, he came up with an idea of what to do--I showed him the t-shirt vinyl that I have in my stash: yellow flocked, light blue smooth and black flocked.  When he saw the yellow, his eyes lit up, "I want a lightening bolt!"  Perfect!  (Of course, I had to make two of them...)


I told him I couldn't do anything with it right then because I'd have to either find a lightening bolt in my Cricut cartridge stack or buy one on the Silhouette store.  (I have the original Cricut and and a Silhouette SD.)  Well, I had an idea--heck, I can draw a freakin' lightening bolt!  Why spend the time searching, then getting out the proper machine when I can just draw it and be done with it?  So that's what I did!

Here's a quick picture recap of how anyone can make a t-shirt with iron-on vinyl--even if you don't own a fancy machine.  If you're good at drawing, you can make any kind of shirt!

  • First, cut out the vinyl in the approximate size you want.  (This vinyl came with my Silhouette machine, but my favorite place to buy any kind of vinyl is Expressions Vinyl because they are cheap, fast, and have great customer service!)

  • Second, draw your design.  I did it on the back (the white side, using a similar colored permanent marker, because if it's darker it will show through.  Not that I've had any experience with that.  Ahem.), but you can do it on the front (the clear side) too in any color marker. 


  • Third, cut out the design.  (Yes, simple designs are the easiest!)

  • Fourth, lay out your shirt and quickly iron it for about 30 seconds--to make it warm.

  • Fifth, lay your cut out design on your shirt, cover with a rag or scrap fabric.
 
  • Sixth, hold your iron on it for 50-60 seconds around the whole design.

  • Seventh, watch your kids race around the house as they show off their cool new shirts!


Happy Creating!

2.11.2012

Pillows

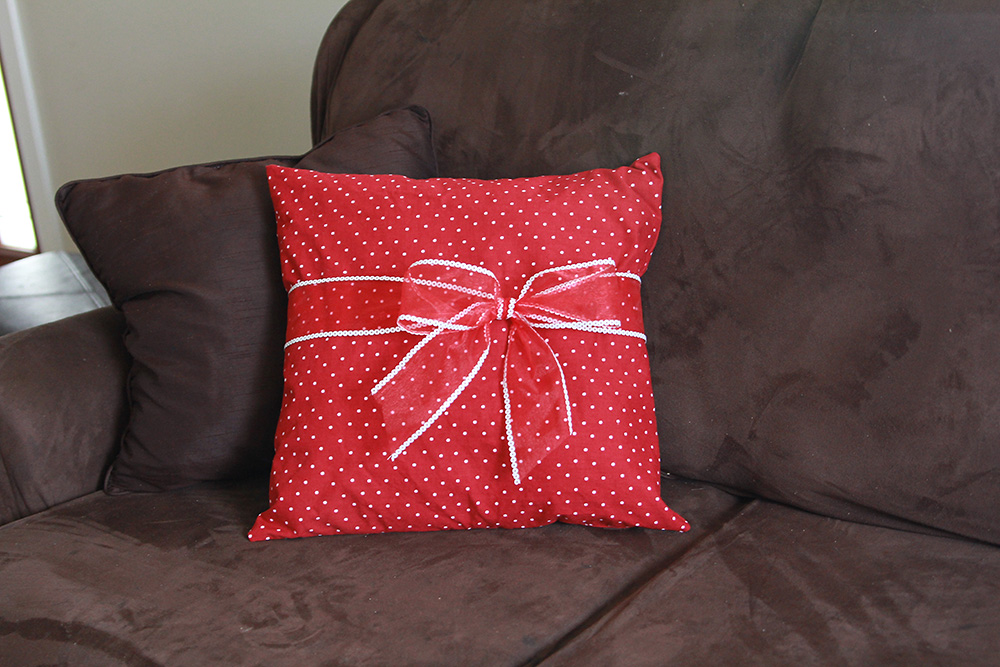
I had an epiphany of sorts the other day.  I love seeing how everyone in blog land has zillions of cute pillows on their couches.  Well, before yesterday, my dark brown couch has had two dark brown plain pillows on it.  Not cute.  (Plus my kids usually throw them on the ground, so that was one excuse for me to not buy any.)

As I saw some cute Valentine's day pillows on Pinterest, and well, those are cute, but then I'd have to store them.  So, I thought back to the pillow slipcover I made awhile ago and then the idea came!  I could make seasonal pillow slipcovers, then I only have to store the slipcover.

I decided to make red pillow covers for Valentine's day.  I ended up making them just red so I can use them around the 4th of July and Christmas as well.  I already had some pillow forms, and got this cute fabric at Hobby Lobby.  I used pillow forms that I've had for quite awhile...


I love the happy pop of seasonal color these add!  Now, I know it'd be cuter with more pillows (and more extravagant), but like I said, they usually end up on the ground. (And you don't even want to know how many times I fixed that dang bow.)  So until my boys get to the point when they feel they don't need to throw them on the floor, we'll just stick with this many...!


Happy Creating!

5.22.2011

Custom “White” Board

IMG_3750i

I added this cute board to my craft room today.  This frame is an accident—it was a mirror frame that I spray painted to match my bedroom.  When I put the mirror back in, I accidentally broke it, and was left with a freshly painted, lonely frame!  I found another frame that I didn’t like and took the glass from it to help make my project.

This “white” board is simply a piece of fabric that matches my walls.  I found a piece of cardboard the same size as my frame and laid it on the back side of my fabric.  Then I cut around the outside, leaving 3 or 4 inches.  I wasn’t precise on this.

IMG_3739i

Next, I glued the edges of my cardboard, using tacky glue.  I glued the whole thing at once, but next time I will do one side at a time, because the glue dried too quickly. 

IMG_3740i

Fold opposite ends over, like gift wrapping a package.  Tuck the corners under, making nice triangles, and glue again.  (Sorry, no picture…)

Put your glass in your frame, then your fabric-covered cardboard, then the back of the frame if you have one.  Use a dry-erase marker on your new board, and enjoy messages like this:

IMG_3743i

Ahh!  A fun little place to write my notes on now! 

IMG_3750i

P.S.  My craft room is getting closer to being done!  Only few more projects to go—when the weather is not so rainy and I can do them outside!  Smile

5.09.2011

Pillow Slipcover

So, the other day during the twin’s naptime, I thought I’d make a fun slipcover for a pillow for my office. I found a tutorial on “Make it and Love it” here. (LOVE that site!) Since you can find the tutorial there, I’m just going to show you my slipcover.

apr 28i

Cute, huh?

Here are the details of the stripe and flower. To make the gathered stripe, I doubled the length of the pillow, gathered it using this method and sewed it on the top and bottom of the stripe (before I put the slipcover together). Then, I eyeballed the spaces in between to create the rest of the textured lines. It’s not perfect, but neither am I! To do the flower, I cut a strip of polka dot fabric about two inches wide and 52 long. I gathered one side, pulled it until it made a circle then sewed circles on top. Next I sewed it on the pillow, then finished putting the whole thing together.

IMG_3318 copy i

This is what the back part looks like, so I can take the cover off and wash it if necessary.IMG_3321 i

“Sew” much fun! Smile

Related Posts Plugin for WordPress, Blogger...