A place to share my latest creative pieces. (I know a million bloggers already do this, but I NEEDED a place too!)

3.15.2013

Um, Yeah....

So, I've still been creating projects, it's just that blogging about them seems to take so much extra work...I've even taken pictures of the projects and have a whole folder full of them on my computer that just need to blogged. 
I wish I had more time for the computer, but my family is my main priority, and the computer just doesn't make my time list much anymore. 
Maybe someday I will get back on the blogging band wagon, but until then, anyone coming across this blog will just have to wait and see if I ever decide make time to post again.  ;) 

6.12.2012

Summer {Fun} School—Birds

We have successfully completed our first week of summer fun school at our house!  Here’s a glimpse of what we did!

summer fun school copy_thumb[8]

For the first week, we chose birds.  No rhyme or reason to it, just did…

For math, I found a large open bird clipart online.  I copied it to a word document and enlarged it to fit the whole page.  I added color words at the bottom in a text box.  Then I assigned each color a number.  For my 7 year old, I wrote subtraction sentences in each space of the bird, and did addition for my 5 year old. 

birds 1

After they answered the math equations, they looked at the answer and colored it according to the number/color at the bottom.

birds 2

For science, I googled “how do birds fly?”.  We found a couple of websites all about how birds fly.  One even had a visual breakdown.  It was actually quite cool, and the boys kept doing it over and over!

We did a science/food experience in one.  We made rice crispy treats with colored marshmallows.  We hypothesized as to what color the marshmallow goo would turn out to be in the end.  None of us were right.  (It turned out pink-ish.)  The yummiest science experiment ever!  Then we shaped the treats into bird nests, complete with marshmallow eggs.  (We were wishing Peeps were still available!)

nests

For our art project, we got out paint and tried to paint something that had to do with birds.  The 7 year old painted a nest in reeds, the 5 year old painted a tree with a bird nest and bird in it.  The 3 year olds just painted—their first painting experience. 

paint 1paint 2

Our fieldtrip was pretty easy.  We live near a bird refuge, so we went there.  There’s a museum that we explored first—they had a lot of fun hands-on things.  We also got a visual check-list of some of the birds that we’d see at the refuge.  They have a 12 mile drive around the marshes to see birds up close.  We went on that and saw some pretty cool birds!  (Though since we live in the country we see most of them by our house anyway.Winking smile

Great Blue Heron

That is a great blue heron flying away from us.  Pretty cool!

I also did a few other activities with the kids when they wanted to do more school.  We have these fun white boards and I have the kids practice writing whatever they need to work on.  To make it more fun, when they’re done they get to circle their very best looking number or letter when they’re done. 
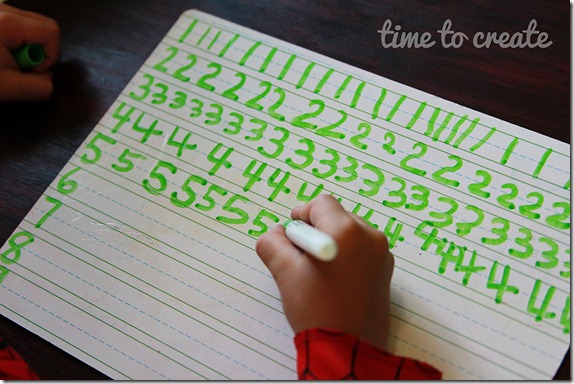
white board

Also, my 5 year old needs practice cutting, so I made an easy fun cutting path paper on the back side of some junk mail.  (And yes, he wears his Spiderman suit almost everyday.)
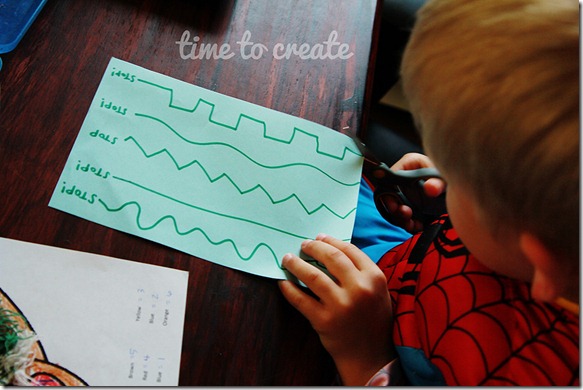
scissors

When school is done, we all get a small treat—sometimes it really helps motivate them!
5.31.2012

Summer {Fun} School

I decided to do “Summer School” with my boys this year.  I’ve always been somewhat relaxed during summer, but now that they’re getting older, I feel it’s important to keep their minds active and engaged. (As well as keeping their skills up.)  I wanted it to be more of an educational fun though, so we’re calling it “Summer Fun School”. 

summer fun school copy

To start off, we thought it’d be fun to do a theme a week.  So we came up with a list of 20 themes, then grouped some of them and cut the rest out.  (Maybe we’ll do those next summer.)    Next, we picked weeks to do each theme—we did this by marking it directly on the calendar so we could work it into things we are already doing.  We scheduled “Oceans” the week we are going on vacation to Washington where we will be seeing a lot of ocean time, and “Farm Animals” the week of our county fair.

Next, we made up a schedule of things to do each day.  Monday is math and history, Tuesday is science and service, Wednesday is a food experience, Thursday is art and music, Friday is a review of the topic using any activities, and Saturday is a fieldtrip as a family since Dad isn’t at work.  This is just a guideline though, and depending on what else is going on, I’ve prepared the boys to be somewhat flexible.  And just because we did math on Monday, doesn’t mean we can’t work it in throughout the week.  I also bought my kids some special notebooks that we will write in everyday to work on writing skills and spelling.  This is the last thing we do at the end of “School”. 

We also have a daily schedule of what we’re going to do throughout the day.  The plan is to do cleaning and exercise in the morning, followed by some play time.  After lunch we will read and have school.  School will take anywhere from 30 minutes to an hour and a half, depending on the activities planned. 

I will be posting each week as it is done, to share the activities and things we did!

Happy summer fun creating!

5.18.2012

Placemat Pillow

This was an idea I saw a few years ago, and now I can’t even remember where I saw it, but I’ve always wanted to try it—a decorative pillow made from a fabric place mat!

pillow 4

First, find a cute fabric placemat that has two layers.  We actually got 4 of these as wedding presents, but I haven’t pulled them out since we had kids, and I figured there’s no reason they should just sit in a drawer. 

pillow 1

The next thing, is to get a seam ripper and take the seam apart that holds the two layers together.  It doesn’t have to be a huge hole.

pillow 2

Next, get some fiber filling and stuff it as full as you can!

pillow 3

Then, depending on the seam, you just hand sew it back together, or because of this seam, I just used my machine!  Simple as that.  A new pillow for my bed in 20 minutes!

pillow 4

Happy Creating!

5.10.2012

Spring Banner

I have put this blog on the bottom of my to-do list for awhile and have pictures for 4 or 5 posts…I’m slowly going to get them up.

I love having things hanging up on my mantle, and since banners are a hot trend right now, I’ve enjoyed making them since this last fall.  Here’s a look at what I made for spring:

banner 1

I used some more of the pages from the book I used to make the wreath for the main part.  Added a few punched circles and stickers, then simply taped the back of it to some twine.  (Yes, I know, it’s not going to last more than a couple of years, but I really don’t care because by then something else will be trendy.)

Banner 2

To make the other banner, I just went through my yellow, green and blue scrapbook paper scrap stash—to match my pillows.  I used a circle punch and a scallop circle punch, folded them in half and stapled them over some jute.  Easy peasy!

Banner 3

Happy Creating!

4.26.2012

Spring Pillows

I got my spring pillow slip covers done—like two weeks ago, just slow at blogging.  Here’s a peek at what I did.  And I actually got a little bit more fancy this time because I will be keeping these covers on through June. 

pillows 1

That white flower strip is actually ribbon!  So stinkin’ cute!

pillows 2

Here’s a close-up of the ruffles.  Just ribbon so it was quick and easy!  I ♥ ruffles!

pillows 3

I got the yellow chevron fabric from Bobbie Lou’s Fabric Factory (on Etsy).  The green damask is from Walmart.  The blue polka dot was from fabric.com.  All the ribbon is from Hobby Lobby.


Happy Creating!

4.20.2012

CD Backup Holder

So many times I’ve wanted to have a place to put burned CD’s in my scrapbooks—backups of pictures and digital pages mostly.  Well, I figured out how to store them and I’m going to share it with you today!

CD 3

To make the CD storage, I used a “Design E” page from Becky Higgins.  The pockets are 6x6, so I cut up one 12x12 into 4 squares, then I decorated the bottom two squares.  It would’ve been easier to decorate the page, then cut.  (They’re not perfectly lined up.)  To make the banner on top, I used tacky glue on the outside to hold the twine, then I just cut triangles, inked the edges and used pop-dots to make them stand up. 

CD 2

Then I used found an ugly piece of paper, cut it 6x6 and folded it in half so I knew where the middle was.  I punched a hole in it and used it as a template to punch a hole in each square.  Then I put a brad in it.  This is so that when the album gets turned sideways or upside down, the CD’s don’t fall out! 

Now, this is just so I have easy access to my backed-up files.  I do have another copy in our fire safe.  Just to be extra safe.  I love this though so that I can always get to my files easily if I need to! 

I made this holder to go with my “This Is Me” album.  You can see details of the album in whole here.  Here’s a look at the front page of my album, just so you can see how cute it matches the CD holder!

Cover Page

Supplies Used:
-Design E Page Protectors,
Becky Higgins.
-Paper and brads used for cover page and CD storage, SEI “Winnie’s Walls" collection.
-Twine, The Twinery
-Scallop border punch, Fiskars
-Scallop circle punch, The Paper Studio
-Small circle punch, EK Success
-Flower, Prima
-Crop-a-dile Big Bite (to punch holes for the brads in the bottom CD pockets)

Related Posts Plugin for WordPress, Blogger...